Zoom Instructions for VITAS Support Groups
We have found Zoom to be an excellent platform to get together and share grief information and support. All that you need to join the group is an email account and a device that can access the Internet, such as a computer, smartphone or iPad. Using the camera display (video) on your device is not required, although it is helpful to forming group rapport.
Preparation for a Zoom Group
- Be sure you’re in a private and quiet area (away from pets, television, other conversations, etc.).
- Use headphones, if you have them, so people in your house don’t overhear confidential information.
- Be sure you and your environment are ready to be seen.
Joining a Zoom Group
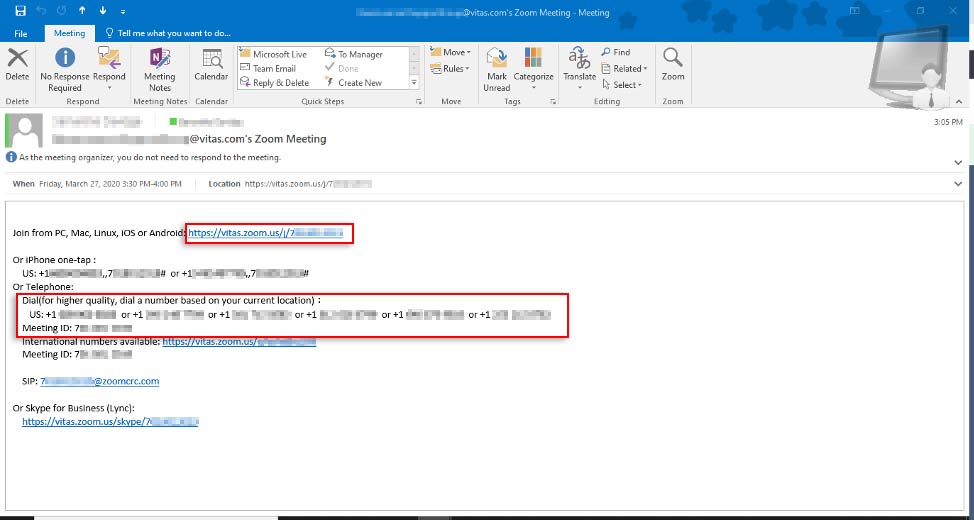
Step 1: You will receive the Zoom link via email from the VITAS group facilitator.
The meeting link should not be given out. If someone you know is interested in participating, have them contact the facilitator first.
At least 10 minutes before the start of the group, click that Zoom link to connect to the group. Use your device to view and listen; or alternatively, just listen by phoning in using the numbers as shown below.
By phone, you will be asked to enter the Meeting ID and the Participant ID, both followed by the pound or hash (#) symbol.
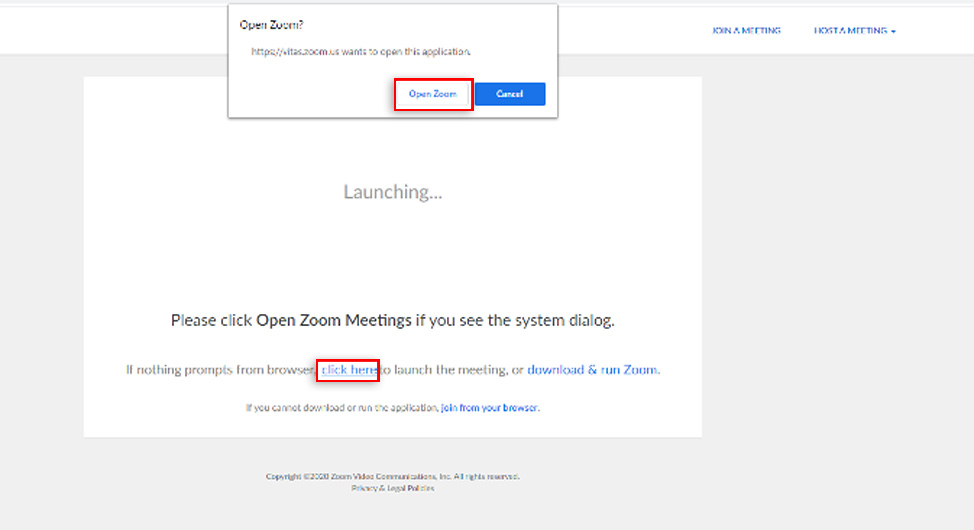
Step 2: You will then see this screen.
Click either area to launch Zoom Meeting:
Step 3: Select your preference to join with Computer Audio or by Phone Call.

If you select to join by phone call, several telephone numbers will be listed. Call the first telephone number listed. If that line is busy, try the next one.
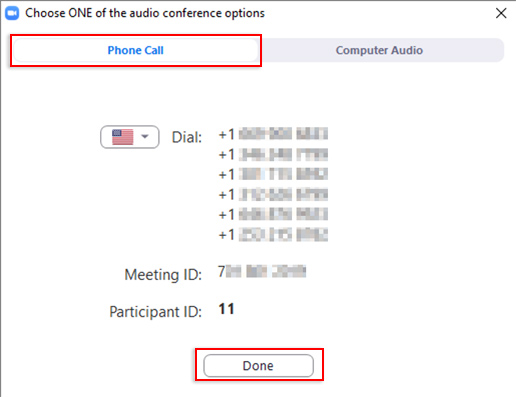
Enter the Meeting ID and Participant ID, both followed by the pound or hash (#) symbol. Then click Done.
Step 4: Once in the meeting, this is the view.
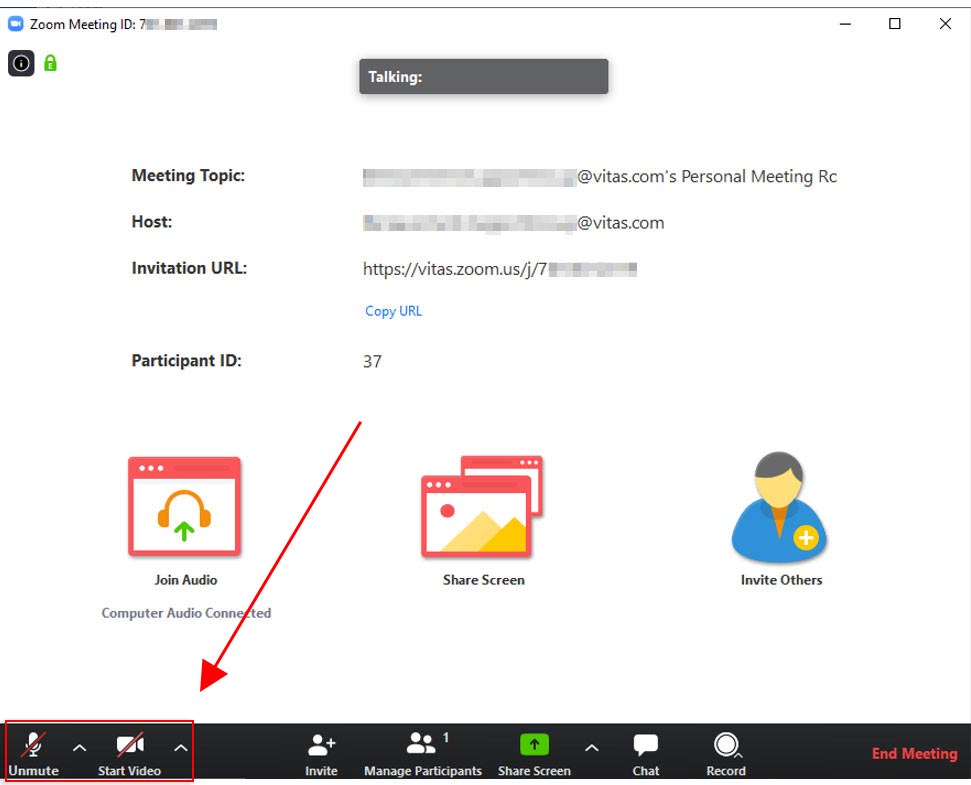
The audio (microphone symbol) and video (camera symbol) in the bottom left-hand corner of the screen will be disabled when you first enter. Once the facilitator enables these features, you can operate them according to your preference.
Click the microphone (audio) to unmute. Click the video (camera) to enable viewing others in the meeting.
Additional Features You Can Choose to Activate:
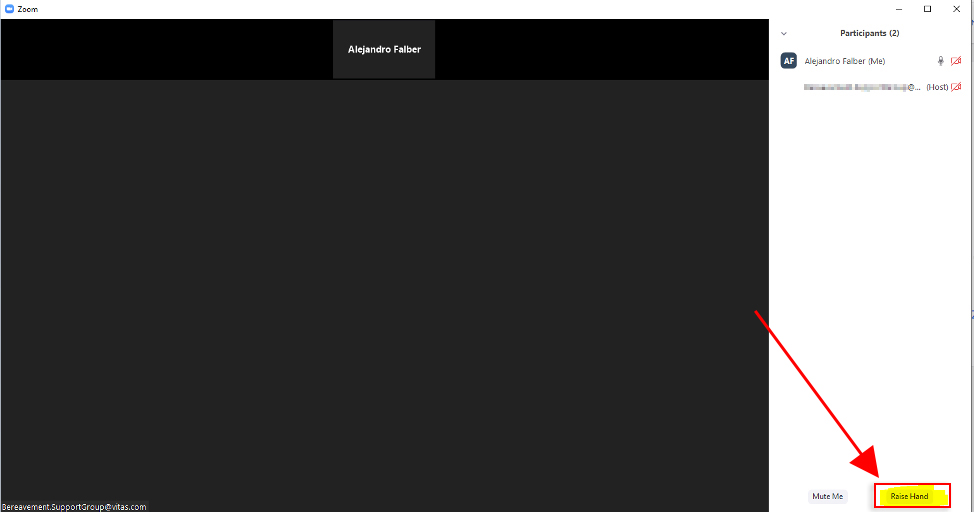
Raise Hand: This feature allows the facilitator to see that you have a question or comment. To locate, click “Participant” at the bottom of the screen. You may have to toggle over this area to activate it. Move your cursor towards the bottom of the Participant list until you see the “Raise Hand” icon. Click it and a hand will appear next to your name. Once your question is addressed, click the icon again to lower your hand. Please note the Chat feature has been disabled.
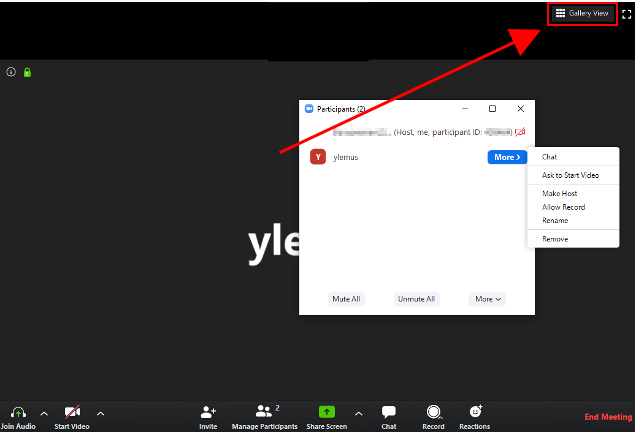
Gallery View/Speaker View: This icon is located in the top right corner of the screen. Again, you may have to toggle over this area to activate it. Speaker View allows you to view whoever is speaking. Gallery View allows you to view all attendees.